Installing Saltbox on a home server
| Description / name | Input element |
|---|---|
| Your domain name |
This article discusses details to consider when running Saltbox on a home server behind a residential router. It's not meant to replace the existing install documentation. Things here may not be discussed in sequence, as it's not intended as an install guide. For that, refer to the install guide on the menu bar above.
Prerequisites:
-
You have a Domain
-
You have a Static IP OR Dynamic DNS configured
-
Your ISP supports you running servers on ports 80 and 443. Some ISPs don’t allow or actively block this.
-
Your Router supports port forwarding and hairpin NAT (or NAT loopback) Saltbox assumes that you are accessing apps via subdomains like “radarr.yourdomain.tld” rather than ip and port like 192.168.1.25:7878. Without “hairpin NAT”, a request to “radarr.yourdomain.tld” from inside the network will not find its way to the proxy which does that routing. [You can configure internal DNS in various ways to get around this, but this article is assuming the simplest path.]
-
Your Router supports port forwarding specifically on ports 80 and 443. Some ISP hardware apparently supports port forwarding generally, but not for these specific ports.
NOTE: None of this initial setup is Saltbox-specific. If you want to run a server on a machine behind your router and connect to it using a domain name, whether Saltbox sets it up or something else, you’ll need to do these very same things. THere is no setting in saltbox that will allow you to overcome your ISP not allowing servers on 80 and 443, or your router co-opting ports 80 and 443 for its own UI.
Domain
You need a domain. They’re cheap or even free.
You can find cheap ones here.
There are a variety of places that provide free domains. Here’s one offered with no endorsement; the first Google result for “free domain”.
Configure the DNS at your registrar to point your domain at your home external IP address.
You can find your home external IP address using something like: https://whatismyipaddress.com/
Dynamic DNS
You will need to configure “dynamic DNS” to make sure that domain keeps pointing to your home IP, which is subject to change, most likely. If your home IP is static, you do not need to worry about this.
When you set up a server in a data center, typically that server has a fixed unchanging IP address, so you set up DNS one time. Most residential internet connections do not get a fixed address; your home IP will change periodically. "Dynamic DNS" updates your DNS setup whenever your IP address changes, ensuring that "myhomeaddress.com" always points at the correct IP address.
Probably your router has this available. If not, there’s a Dynamic DNS Client role available in saltbox you can install.
If you use Cloudflare for DNS, use the ddns saltbox role and it will be configured for you. if the ddclient role has been installed, remove it first.
sb install ddns
If you are using another DNS service, install ddclient, and configure it manually. You will find the config file in /opt/ddclient:
sb install ddclient
You’ll do this AFTER you’ve installed saltbox.
Router
Port Forwarding
You need some ports forwarded to that machine on your router. Explaining how to do that for any arbitrary router is out of scope, but I’ll show you where it is on my Netgear.
Port forwarding is rather like ordering a pizza at a fancy hotel rather than at home. When I order a pizza at home, the delivery comes right to my door; when I order a pizza at a fancy hotel, the delivery arrives at the front door of the hotel, and the front desk clerk has to make sure it gets routed to the correct room.
A remote server like one at Hetzner is just exposed to the open internet, so when you connect to that server on port 123, you’re connecting directly to that specific machine. This is the "pizza at home" scenario.
Your home network doesn’t work like that. Your ISP gives you a single IP address, and your router translates all traffic in and out of your network to make sure it gets to the correct place. This is the "pizza at a fancy hotel" scenario.
This means that when a connection from the outside comes in, it is connecting to the router, not any individual machine. You need to set up port forwarding so that when you try to connect to Radarr, for example, your router knows to send this request to the machine where you’ve installed Radarr.
There are two parts to what you need to do:
-
Give your server an unchanging local IP address
-
Forward requests from the outside on relevant ports to that IP address.
The first is required because typically your router will be able to configure port forwarding to an IP address, so you don’t want the IP of your server changing. Typically, on your router, everything gets an IP assigned automatically by the router’s DHCP server, so the IP address of a specific thing might change. Depending on how your network is set up, it may be unlikely, but it’s a possibility nonetheless, so we’re going to make sure it doesn’t happen by telling the router “Always give this machine the IP address 1.2.3.4”.
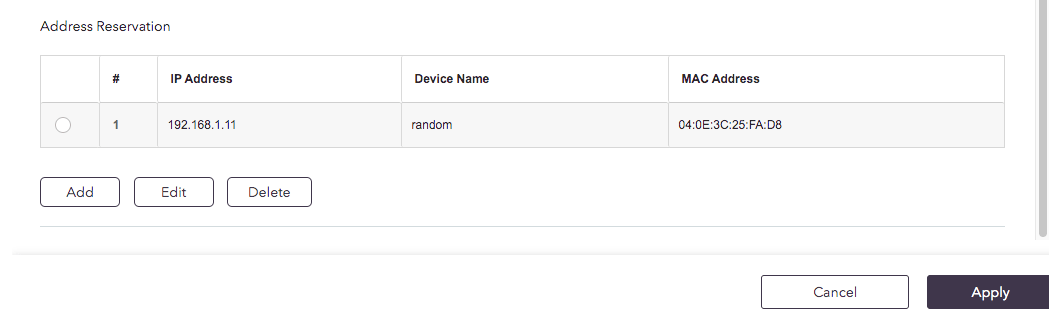
On my Netgear, they call this “Address Reservation” and it’s found under “LAN Setup”:
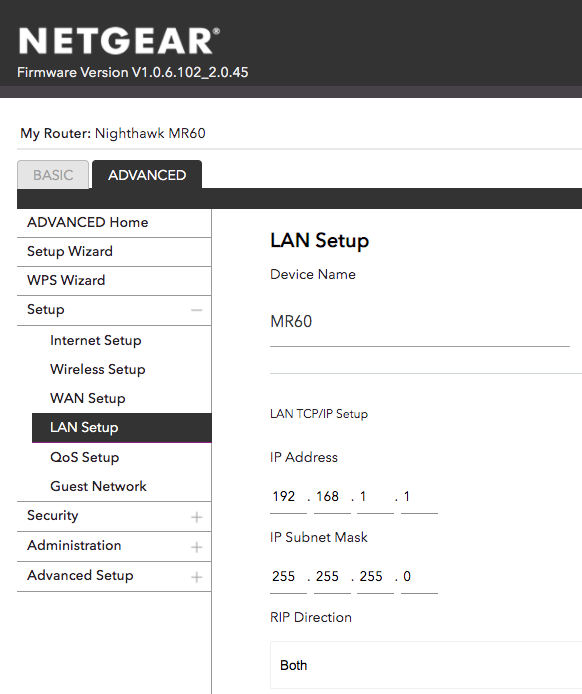
I scroll to the end of that list, click “Add”, then choose a device and type in the address I want that thing to have.
The server I’m installing Saltbox on is named “random”, and I’ve assigned it 192.168.1.11. The "MAC Address" is an identifier built into the the piece of hardware; typically you'll choose that from a list of connected devices.
Next, port forwarding:
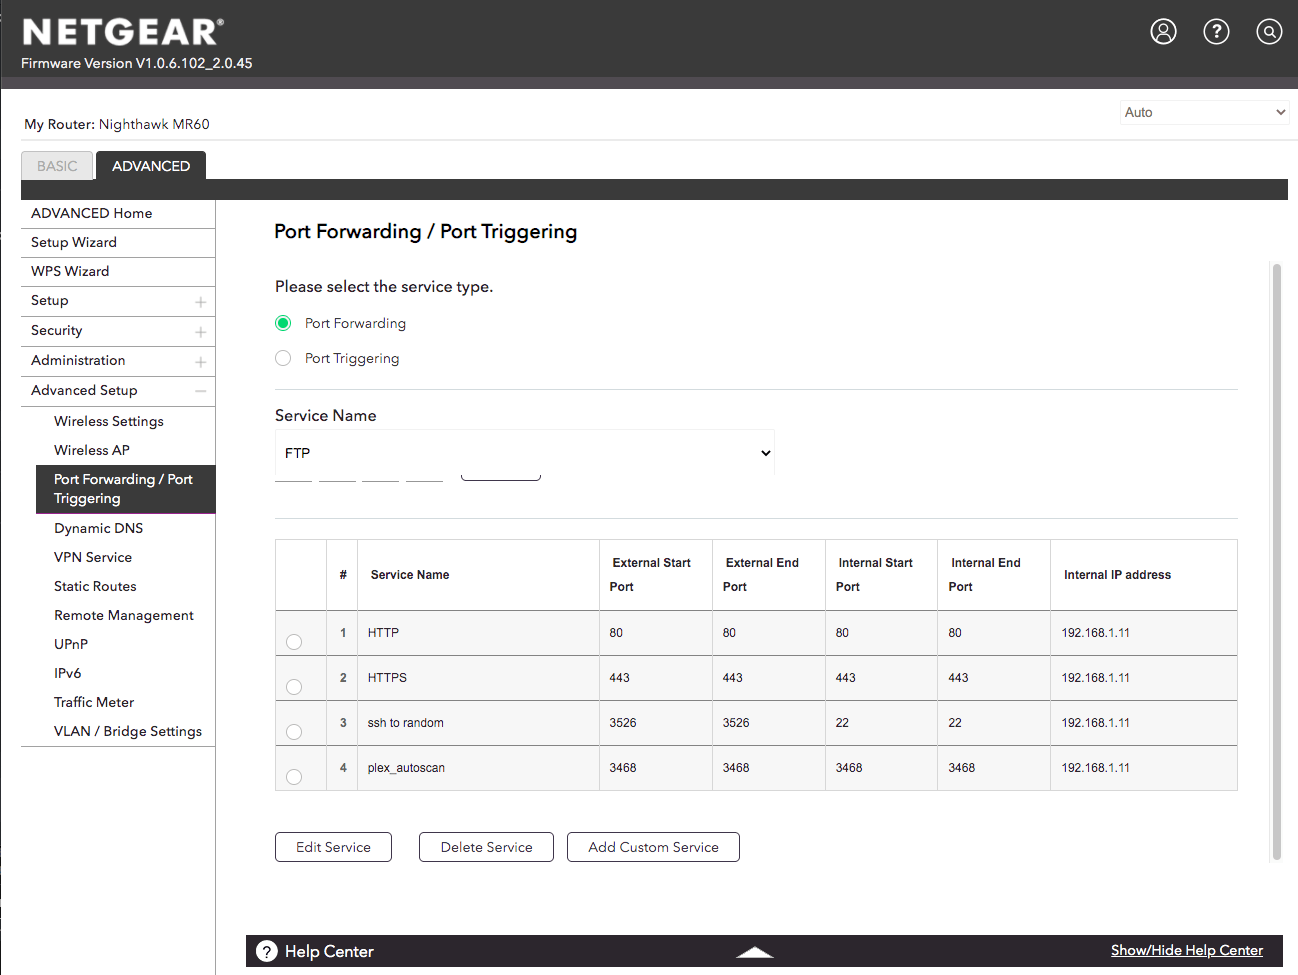
You can see here that I’ve set it such that outside requests to port 80, 443, 3526, and 3468 get forwarded on to the IP we just assigned to the saltbox server.
Saltbox requires that ports 80 and 443 be forwarded. All others are optional.
Depending on the applications you end up installing, you may need to forward other ports. You may not need to forward any besides 80 and 443. You may not need to forward 22 or 3468. This is just an example that covers the reverse proxy (80 & 443), ssh on an alternate port (3526), and Plex-Autoscan (3468). Your specific requirements may be different.
NOTE: Autoscan has replaced Plex-Autoscan in the default setup. Autoscan is routed through the reverse proxy and doesn't need a port-forward.
Note this example assumes you have not modified either the SSH listening port or the plex-autoscan listening port on the Saltbox machine. If you have done, then you should forward to the relevant ports instead of to 22 and 3468.
Ports used by the stock saltbox apps can be found here.
Warning
If your ISP (or router) does not allow you to forward ports 80 and 443 to an arbitrary machine on your network, STOP NOW. You won’t be able to run saltbox at home.
Port Forward Testing
At this point, you should be able to SSH to that machine using your domain.
ssh YOU@yourdomain.tld -p 3526
That should work just like:
ssh YOU@192.168.X.Y
If it doesn’t, verify all the port-forwarding details.
You should also be able to connect to a web server running on that machine. Let's test that.
Verify this part is working by installing apache on your server:
sudo apt install apache2
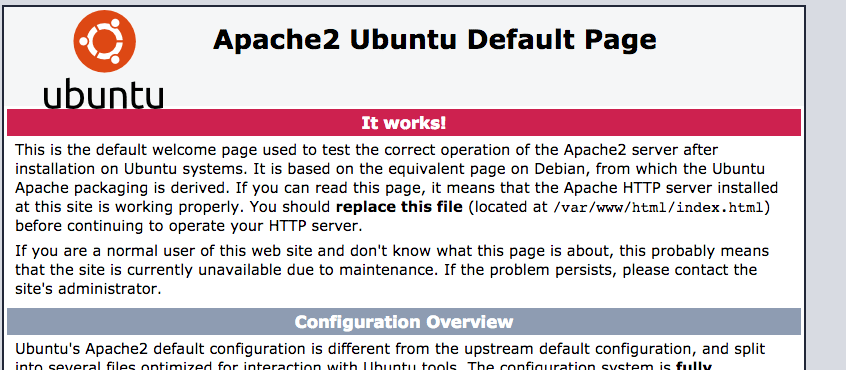
Then open a web browser and go to your domain (http://yourdomain.tld). Maybe use your phone with wifi off to make sure the request is coming from outside your house. Requests coming from inside the house are not only bad in horror movies, they are bad for verifying port forwards as well.
If you see the default apache page, you’re set to go.
Once verified, remove apache:
sudo apt remove apache2
Warning
You MUST remove apache before installing saltbox
With that done, we can move on to the install.
Warning
IF THAT DOESN’T WORK, DON’T CONTINUE UNTIL IT DOES. Saltbox will not work if that simple test didn't work. Verify your port forwarding setup and try again. Verify that your ISP allows this.
Narrated example install
From this point on there is nothing special about the install process on this home server as opposed to a remote server. I’m just following the docs.
This is just an example of the install. You should refer to the actual install docs.
I installed Ubuntu server 24.04 on the machine, accepting all defaults except:
- I enabled OpenSSH and imported my SSH keys from github
That’s all.
Since I installed Ubuntu on my own hardware, the first user I created is a member of the sudoers group. I’ll be running the install as that user from the start rather than starting as root like you would on a remote server.
First, I set up the port forwards and so on as detailed above.
I ran the first dependency script on this page.
That ran for a while and finished without errors.
In my accounts.yml, I’m entering an existing account on the ubuntu machine [this is the account I created when I installed Ubuntu]:
-
user:
  name: chaz           # Existing account name
  pass: REDACTED       # Existing account password
  domain: yourdomain.tld
  email: chaz@whatever.com
plex:
  user: REDACTED
  pass: REDACTED
  tfa: no
cloudflare:
  email: REDACTED
  api: REDACTED
pushover:
  app_token:
  user_key:
  priority:
apprise:
dockerhub:
  user:
  token:
I entered my cloudflare credentials because DNS for the domain I’m using is set up there, so the saltbox install is going to create the subdomains for me.
I made no changes to settings.yml.
Run the preinstall:
sb install preinstall
In my case there were no kernel updates required, so the preinstall didn’t reboot.
I am already logged in as the user I specified in accounts.yml, so I didn’t have to log out of the root account and log back in as chaz. If you specified a new account that the preinstall created, you need to log out and log in as that account.
I then set up the rclone remote as usual.
Next, I ran saltbox setup:
sb install saltbox
In my case the setup ran through without problems the first time:
PLAY RECAP ********************************************************************************************************
localhost                  : ok=787  changed=197  unreachable=0    failed=0    skipped=329  rescued=0    ignored=0

Friday 18 February 2022  15:15:15 -0600 (0:00:02.386)       0:33:08.898 *******
===============================================================================
user : User Account | Reset ownership of '/opt/' path ----------------------------------------------------- 651.36s
system : APT | APT full-upgrade --------------------------------------------------------------------------- 226.68s
docker : Binary | Get 'Docker CE CLI' version ------------------------------------------------------------- 121.57s
unionfs : Docker | Daemon | Restart docker service -------------------------------------------------------- 121.49s
unionfs : Docker | Containers Stop | Stop all running Docker containers ----------------------------------- 109.26s
docker : Wait for 60 seconds before commencing ------------------------------------------------------------ 60.49s
unionfs : Docker | Daemon | Wait for 30 seconds before commencing ----------------------------------------- 30.33s
iperf3 : Build and install iperf3 ------------------------------------------------------------------------- 19.05s
plex_extra_tasks : Stop Docker Container ------------------------------------------------------------------ 16.10s
docker : Re-start all previously running Docker containers ------------------------------------------------ 15.95s
system : APT | Remove dependencies that are no longer required -------------------------------------------- 15.61s
unionfs : Docker | Containers Start | Start all previously running Docker containers ---------------------- 15.58s
docker : Stop docker service ------------------------------------------------------------------------------ 14.77s
plex_extra_tasks : Post-Install Checks | Wait for Plex executable to be created --------------------------- 11.76s
remote : Rclone VFS | Start 'rclone_vfs.service' ---------------------------------------------------------- 11.41s
traefik : Resources | Tasks | Docker | Remove Docker Container | Remove Docker Container ------------------ 11.28s
nzbget : Post-Install | Wait for 10 seconds --------------------------------------------------------------- 10.25s
plex : Resources | Tasks | Docker | Remove Docker Container | Remove Docker Container --------------------- 10.05s
system : Populate Service Facts --------------------------------------------------------------------------- 9.70s
qbittorrent : Resources | Tasks | Docker | Remove Docker Container | Remove Docker Container --------------- 7.45s
Now I did one last log out and back in so I could access the docker command.
At this point, everything is running and I’m ready to go through the application setup.